Xcode Mark Lines allows us to create a better overview of sections within our classes or structs. A so-called mark comment adds both a chapter title and linebreak in the Xcode method navigator. This chapter split makes it easier to quickly navigate through a relative big object.
Even-though this technique is great and allows us to speed up the navigation within instance definitions, it’s important to understand that we might be fixing something that shouldn’t even exist. Therefore, before we dive into the how-to details, I’d like to explain why you should be careful.

Why you should rethink before adding a Mark comment
Having the need to add a mark comment often indicates that your class or struct is too large to easily navigate through. This could be an indication that you’ve written an instance that’s doing too many things.
In this case, it might be worth to rethink your code and see whether you can split it up in multiple instances with single responsibility. In the end, less code is often more readable.
In some cases, it’s hard to prevent large code files. An example could be a view controller inheriting lots of protocols (I still think you can split those up!) or a framework in which you defined lots of logic in one file.
I’ll leave it up to you to decide whether you should split the code up or whether marks will help you out. For the latter, I’ll be your guest and explain in detail how you can make use of Mark comments.
Adding a // MARK: comment to your code
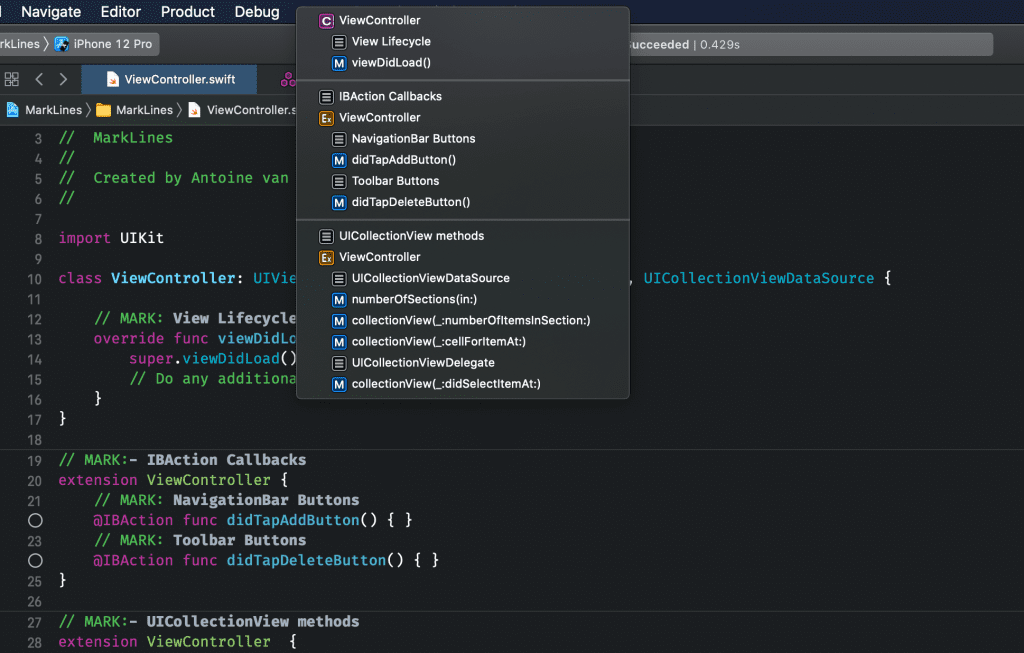
Xcode Mark Lines are added through commented code. Xcode parses those comments into chapter lines within the method navigator. There are several ways of using them each with their own added value.
Adding a // MARK header
The simplest // Mark is the header variant:
// MARK: UICollectionViewDelegateThis adds a chapter title in your file’s methods navigator:

Adding a // MARK header with a line separator
A separator line can be added to a marked chapter by using a dash after the colon:
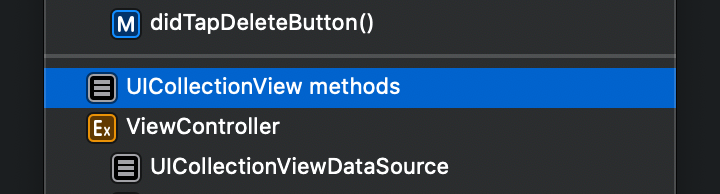
// MARK: - UICollectionView methodsThis will create a clear separator between the methods in the method navigator:
Using nested marks
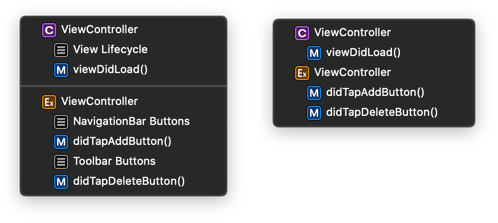
In the above image, you can see the UICollectionViewDataSource mark being nested within the ViewController extension. This is an example of using marks in a nested manner.
Creating a separator line only
The great thing about the mark comment is that the title is not required.
// MARK: -
extension ViewController {
This means that we can create a clean separator line in our code without having to name a certain section. This can already improve navigation through our instances, even for the smaller ones.
Adding a // FIXME: comment
Another great hidden feature is the // FIXME: comment:
func collectionView(_ collectionView: UICollectionView, numberOfItemsInSection section: Int) -> Int {
    // FIXME: Use the view model for this number.
    return 10
}
The great thing about this mark is that it adds a nice little band-aid icon to identify this method needs to be fixed:
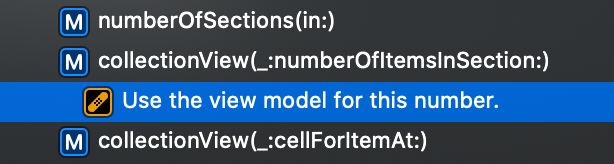
Ideally, this is combined with a warning so that you make sure to fix this as soon as possible:

You can read more about Compiler Diagnostics Directives if you want.
Adding a // TODO: comment
Lastly, we can add a // TODO: comment which works the same as the previous // FIXME: comment:
func numberOfSections(in collectionView: UICollectionView) -> Int {
    // TODO: Use the view model for this number.
    #warning("Use the view model for this number.")
    return 1
}
However, this one adds a different symbol, indicating a todo-list:
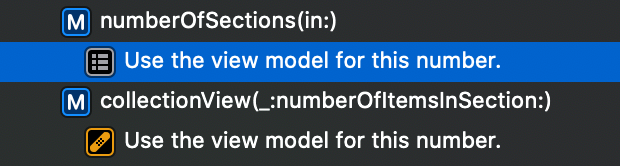
It’s up to you which one to use but as you can tell from the above image it’s clearer to use the // FIXME: marker as the icon is more visible.
Xcode Mark Line not working
Even-though I did my best to explain the mark comments in detail, you still might end up with mark comments not working. Just to be sure before you go Googling your answer, this is a simple checklist to verify you did the right thing:
- Use uppercase characters
MARK - Only use two slashes
// - Don’t forget the colon
:
Conclusion
Xcode Mark Lines are a useful tool to improve the navigation of your instances. There are different kind of mark comments, including // FIXME: and // TODO:. A fine combination can improve the readability of the method navigator in Xcode.
If you like to improve your Xcode knowledge, even more, check out the Xcode category page. Feel free to contact me or tweet to me on Twitter if you have any additional tips or feedback.
Thanks!