By implementing Sparkle into RocketSim, I’ve been able to allow developers to install my app on macOS outside of the Mac App Store. I found out that many developers don’t like logging into an iCloud account on their work machine, making it hard to installs apps from the official App Store.
Yet, I did not want to leave the Mac App Store. It’s a huge source of organic installations and it works for the majority of developers. Therefore, I started a journey of offering the app in both places. While I expected it to be an easy journey, I encountered quite a few challenges. It’s time to share my story and help those out who are running into a similar journey.

Using Sparkle to provide updates
First of all, I’d like to introduce you to Sparkle. Sparkle is an easy-to-use software update framework for macOS applications, open-sourced, and free to use. It exists for years and should be your go-to solution when providing updates to your macOS apps outside of the App Store.
Setting things up can be a little challenging, but I found this article by Oskar Groth super helpful. It explains the process of providing updates and shares valuable scripts to automate things accordingly.
Creating builds for both distributions using schemes
In this article, I solely want to focus on setting up your Xcode project to have a single app target, but individual schemes. An easy approach to support multiple distributions would be to create a target per distribution channel. However, it would also mean having to maintain multiple targets, which can be cumbersome overtime. I decided to take the challenge of supporting multiple distribution channels with a single target.
I ended up with a solution that involved the following:
- A
SPARKLEcompiler directive to use like#if SPARKLEin your code - Two new build configurations:
Debug-SparkleandRelease-Sparkle - A new
RocketSim Sparklescheme that uses these two new build configurations - Several custom build settings based on the active build configuration
- Manual linking of the
Sparkle.frameworkto ensure it’s not included in Mac App Store builds

FREE 5-Day Email Course: The Swift Concurrency Playbook
A FREE 5-day email course revealing the 5 biggest mistakes iOS developers make with with async/await that lead to App Store rejections And migration projects taking months instead of days (even if you've been writing Swift for years)
A rookie mistake leading to an on launch crash in the Mac App Store
The last point on the list was especially important, as I made a rookie mistake with it for one of my releases. This is the code I use inside my project:
#if SPARKLE
import Sparkle
typealias SparkleUpdating = SPUStandardUpdaterController
extension SPUStandardUpdaterController {
convenience init(startingUpdater startUpdater: Bool) {
self.init(startingUpdater: startUpdater, updaterDelegate: nil, userDriverDelegate: nil)
}
}
#else
typealias SparkleUpdating = NoopSparkleUpdater
struct NoopSparkleUpdater {
init(startingUpdater startUpdater: Bool) { }
func checkForUpdates(_ sender: Any?) { }
func startUpdater() { }
}
#endif
struct SparkleUpdater {
static let standard = SparkleUpdater()
private let updaterController: SparkleUpdating
init() {
updaterController = SparkleUpdating(startingUpdater: true)
}
func checkForUpdates() {
updaterController.checkForUpdates(nil)
}
func start() {
updaterController.startUpdater()
}
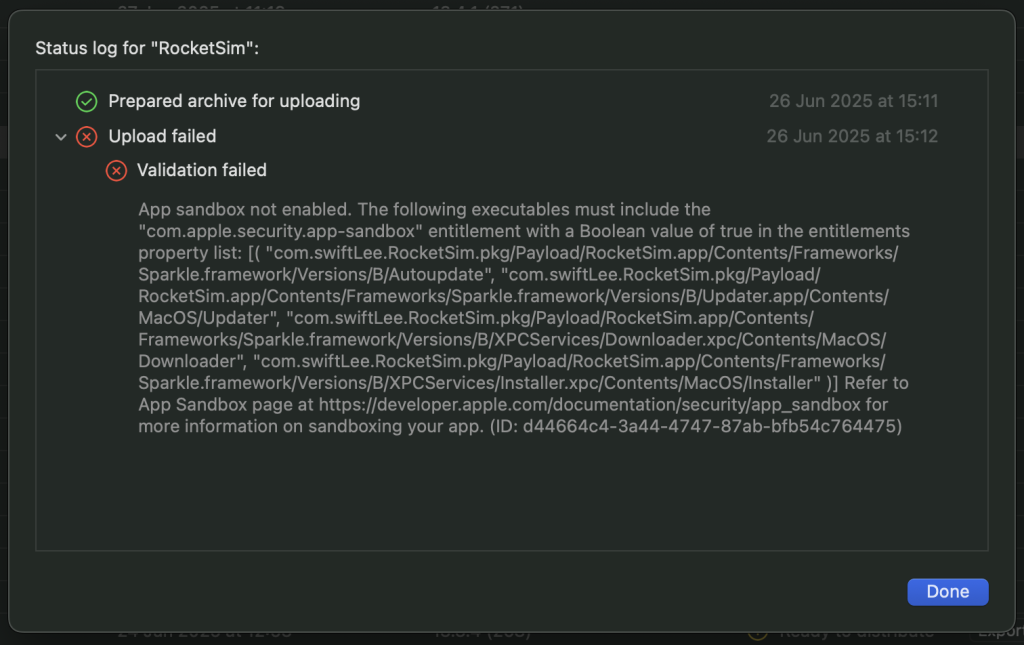
}I thought: if I dont import Sparkle due to using #if SPARKLE around it, there must be no reason for Xcode to actually link Sparkle.framework. I also marked the framework as Optional inside the Link Binary With Libraries build phase to allow the linker to skip it. Yet, while submitting, I ran into the following error:
In other words, the build is still embedding Sparkle.framework. So, I decided to create a build phase which will remove the framework since I knew I wasn’t actually using it:
echo "Removing Sparkle.framework"
rm -rf "${TARGET_BUILD_DIR}/${FRAMEWORKS_FOLDER_PATH}/Sparkle.framework"
You can feel it coming—the linker did actually link the framework. My build got reviewed and approved into the App Store and before I know it I was requesting an expedited review to fix this on launch crash:
Termination Reason:    Namespace DYLD, Code 1 Library missing
Library not loaded: @rpath/Sparkle.framework/Versions/B/Sparkle
Referenced from: <2DB4E317-7382-39DE-AD0B-DD935F7CC804> /Applications/RocketSim.app/Contents/MacOS/RocketSim
Reason: tried: '/Applications/RocketSim.app/Contents/Frameworks/Sparkle.framework/Versions/B/Sparkle' (no such file), '/Applications/RocketSim.app/Contents/Frameworks/Sparkle.framework/Versions/B/Sparkle' (no such file)
(terminated at launch; ignore backtrace)
That’s where my journey started to go from what I thought was a straightforward solution to a more complex implementation for a single target use case.
Manually linking Sparkle.framework and ditching Swift Package Manager
The first step was to remove Swift Package Manager for Sparkle and manually import Sparkle.framework. There is no way to provide access for the linker to a .framework when using Swift Package Manager, without actually referencing the framework inside the Link Binary With Libraries build phase.
I downloaded the latest release and copied the Sparkle.framework into my project. You need to add the Sparkle.framework to your target as well. This will just bundle it without linking, which is exactly what we need.
The next step is to manually link the framework when your build configuration is set to one of the Sparkle ones. To do this, you need to make sure your framework path is found by updating the framework search paths:

Up next is to add -framework Sparkle to “Other Linker Flags” for your Sparkle configurations. This will actually perform the linking.
Finally, you need to make sure you remove the embedded Sparkle.framework for non-Sparkle builds. You can do this by creating a new run script phase at the end of your build phases with the following content:
if [[ "$CONFIGURATION" == "Debug-Sparkle" || "$CONFIGURATION" == "Release-Sparkle" ]]; then
    echo "Keep the Sparkle.framework in!"
else
    echo "Removing Sparkle.framework for configuration: $CONFIGURATION"
    rm -rf "${TARGET_BUILD_DIR}/${FRAMEWORKS_FOLDER_PATH}/Sparkle.framework"
fi
Altogether, you’ll enjoy a single app target that allows creating releases for both the App Store and Sparkle.
Conclusion
Support both the Mac App Store and Sparkle for macOS applications is a common scenario, but managing it in Xcode can be challenging. By using a single app target with custom build configurations and schemes, you’ll be able to set up a structure that works for both.
If you like to improve your Xcode knowledge, even more, check out the Xcode category page. Feel free to contact me or tweet me on Twitter if you have any additional tips or feedback.
Thanks!