Apple announced the Swift Testing framework during WWDC 2024. It transforms the way we write tests in Swift. A new clear, expressive API makes writing tests more straightforward, while the Xcode user interface communicates with improved feedback when a test fails or succeeds.
The testing framework embraces Swift Macros, reducing the boilerplate code you must write for repetitive tests. So-called parameterized tests help you run similar tests over a sequence of values. Hence, you no longer have to duplicate and maintain an almost identical test for a different input value. Let’s dive into how Swift Testing works and how you can use it today.
Writing tests using Swift Testing
If you’re new to testing, there’s not much to compare. However, if you’re used to XCTests, quite a few things are changing when writing tests using the Swift Testing framework.
First of all, we’ll have to import a different framework:
import TestingAfter this import, we can start defining our first tests. What’s interesting here is that we can define tests globally:
import Testing
@testable import SwiftTestingPlayground

@Test func personFullName() {
    let person = Person(firstName: "Antoine", lastName: "van der Lee")
    #expect(person.fullName == "Antoine van der Lee")
}
Note that we’re importing SwiftTestingPlayground using the @testable attribute to allow access to internal types like the Person struct.
We’ve defined the test using a new @Test macro, which replaces the XCTest test method prefix. Inside the test, we’re making use of the #expect macro, which replaces assertions like XCAssert. Make sure to forget the old habit of writing test as a prefix. I actually started writing this article with a test method named testPersonFullName , which is no longer needed due to the @Test macro.
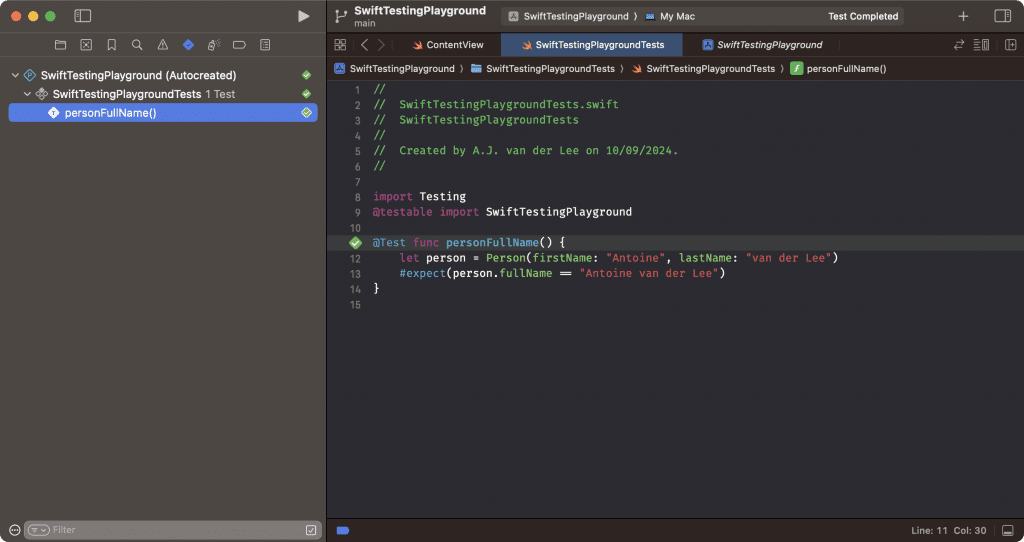
After running the test for the first time, we can look into the test navigator and evaluate the hierarchy:

While the global test works fine in a small project like this, you’re likely looking for a better way to organize your tests.
Organizing tests in Swift Testing
The Swift Testing framework allows you to organize tests using metadata like traits and tags or wrapping tests using structs. We’ll dive deeper into traits and tags in a future article (which I’ll reference here), so let’s see how a parent struct affects the organization of tests.
In this case, we’re testing person-specific code. Therefore, it makes sense to call our wrapper PersonTests:
import Testing
@testable import SwiftTestingPlayground

struct PersonTests {
    @Test func fullName() {
        let person = Person(firstName: "Antoine", lastName: "van der Lee")
        #expect(person.fullName == "Antoine van der Lee")
    }
}
We can rename the test method to no longer contain “person” since the outer struct makes this clear enough.
Assume you’re going to write more tests soon, you might want to go one step further and add another layer called Names to focus on name-related tests only:
import Testing
@testable import SwiftTestingPlayground

struct PersonTests {

    @Test func initialization() {
        let person = Person(firstName: "Antoine", lastName: "van der Lee")
        #expect(person.firstName == "Antoine")
        #expect(person.lastName == "van der Lee")
    }

    struct Names {
        @Test func fullName() {
            let person = Person(firstName: "Antoine", lastName: "van der Lee")
            #expect(person.fullName == "Antoine van der Lee")
        }
    }
}
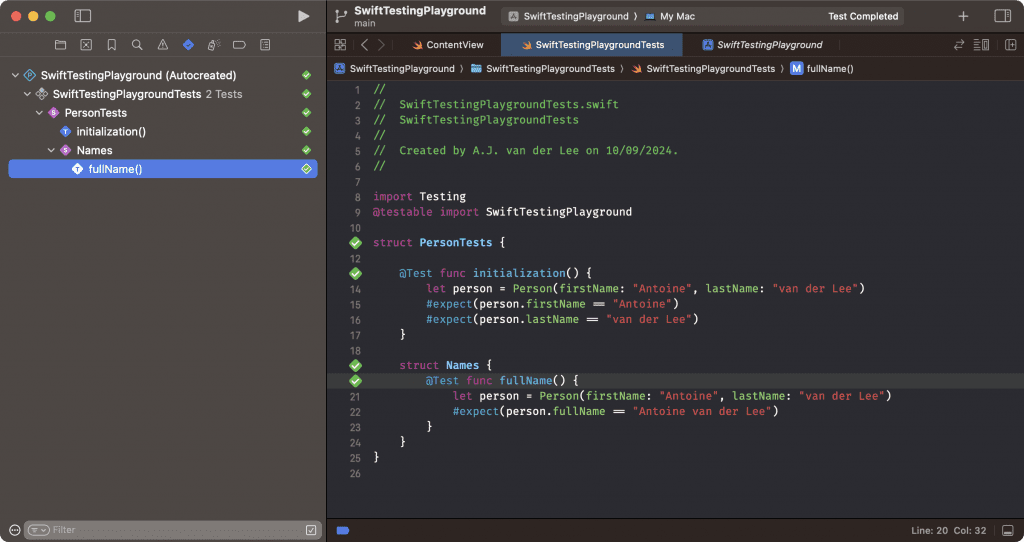
The updated hierarchy inside the test navigator looks as follows:

These are just the basics of what you can do to organize your tests. Stay tuned for more in-depth articles in which we’ll cover tags and traits.
Taking a closer look at the #expect macro
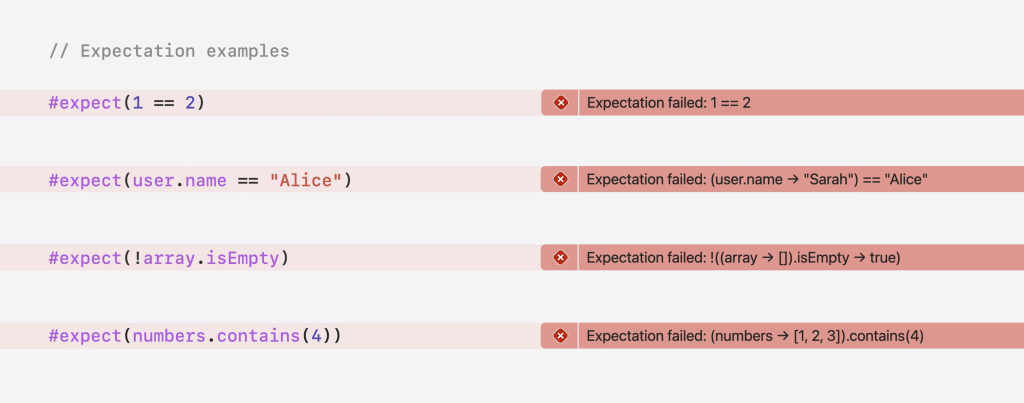
Swift Testing is driven by macros from which the #expect macro has most of the magic. While we had to use all kinds of assertion methods in XCTest, we can now focus on a single method that works magically with anything you use as input.

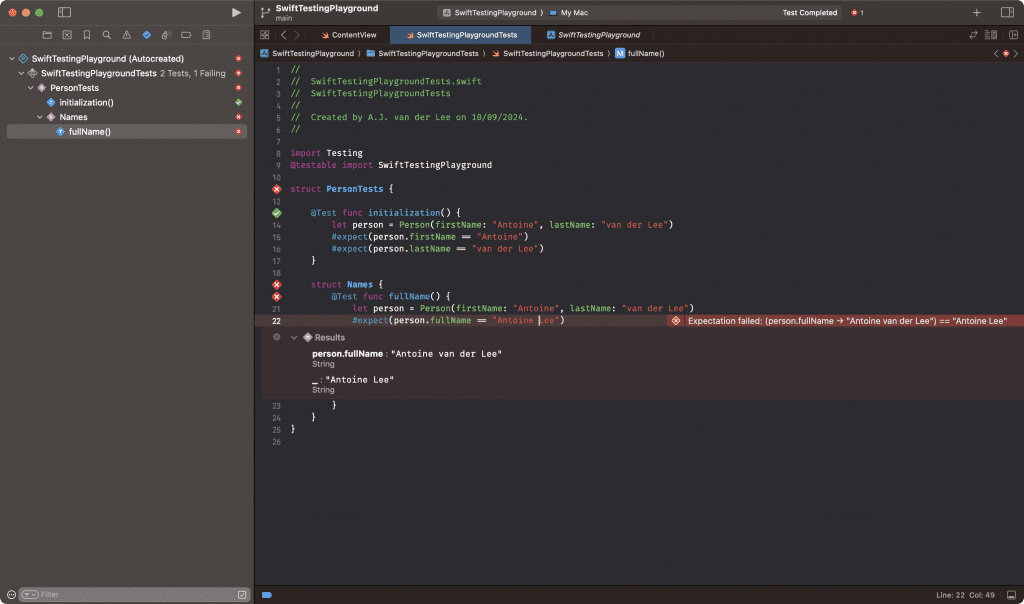
There are many ways to define conditional statements, and the macro is smart enough to transform them into specific failure outputs. This becomes even better when you decide to show more details inside Xcode:

These details will help you solve tests more quickly by making determining what caused the failure easier. In this case, we can see that the person’s full name is defined as “Antoine van der Lee” while our input String matches “Antoine Lee”.
Using the #require macro
When using XCTest, we’ve learned that we can use XCTUnwrap to unwrap an optional or fail the test if it returns nil.
func testFullName() throws {
    let person = Person(firstName: "Antoine", lastName: "van der Lee")
    let unwrappedPerson = try XCTUnwrap(person)
    XCTAssertEqual(unwrappedPerson.fullName, "Antoine van der Lee")
}
In Swift Testing, we can create similar behavior by using the #require macro return value:
@Test func fullName() throws {
    let person = Person(firstName: "Antoine", lastName: "van der Lee")
    let unwrappedPerson = try #require(person, "Person should be constructed successfully")
    #expect(unwrappedPerson.fullName == "Antoine van der Lee")
}
You can learn more about this functionality by reading Using the #require macro for Swift Testing.
Reducing boilerplate code using Parameterized Tests
Parameterized tests are an advanced feature of the Swift Testing framework. By using arguments as input for a single test case, you’ll be able to reduce boilerplate code and maintain fewer test cases.
This is an example of a parameterized test which takes two zipped collections as an argument:
@Test(arguments: zip([Feature.userDefaultsEditor, .networkMonitor], [10, 5]))
func testLimitedFreeUsage(_ feature: Feature, tries: Int) {
    #expect(feature.isNumberOfTriesWithinFreeLimit(tries))
}
You can read more about this feature in my article Parameterized tests in Swift: Reducing boilerplate code.
Migrating existing XCTests to Swift Testing
If you’ve written tests before, you’re likely interested in how to migrate them to Swift Testing. Apple also knew about this requirement and decided to write an in-depth migration article.
Conclusion
The Swift Testing framework transforms how we write tests in Swift and prepares us for the future. We’ve only seen the basics today, but I’ll update this article in the upcoming weeks with references to more in-depth articles on each macro, test traits, test organization, and more.
Here are a few more articles for you to make the most out of Swift Testing:
- Parameterized tests in Swift: Reducing boilerplate code
- Using the #require macro for Swift Testing
- Vapor and Swift Testing: Running tests in parallel
- Using the #expect macro for Swift Testing
- Using Traits to annotate and customize test behavior
- Swift Testing: Writing a Modern Unit Test
Thanks!