A command-line tool can be very useful for automating common tasks to boost developer productivity. While developing iOS applications we often make use of command-line tools like Fastlane and CocoaPods but it’s less common to write your own command-line tools for daily use.
The Swift Package Manager makes it a lot easier to create command-line tools as we can write them in Swift. Once you’ve created your first command-line tool, it’s fairly easy to quickly set up another one. I’ve created a Poes, a command-line tool for testing push notifications in the simulator, in just a few hours!

When should I decide to create a command-line tool?
You should not create a command-line tool for everything. However, common tasks you often repeat might be suitable to be replaced by a CLI tool. It could at least be a way to make the repetitive task easier to do!
An example: Creating a blog post banner
After every blog post I write, I’m creating two blog post banners to share on social media. I have to open Sketch, change the two titles, export it to the right folder, and give it a name that’s in line with the previous banners.
Although this takes me less than 5 minutes, it’s still a repetitive task that’s easy to automate. Therefore, it’s a perfect example of something that you can automate with a command-line tool.
Ask yourself the question: what is something I do repeatedly? Keep that in mind during your day to day job and try to recognize those tasks. Once you’ve got one, I challenge you to use this blog post and write a command-line tool for it!
To give you a bit of inspiration, these are two of my own created CLI tools:
- Poes: A Swift tool to easily send push notifications to the iOS simulator
https://github.com/AvdLee/Poes - GitBuddy: Your buddy in managing and maintaining GitHub repositories.
https://github.com/WeTransfer/GitBuddy
Creating a command-line tool using the Swift Package Manager
If you’re unfamiliar with the Swift Package Manager, I highly encourage you to first read my blog post called Swift Package framework creation in Xcode.
Once you’ve found something you can automate or replace by a command-line tool, it’s time to dive in and start creating it. We initialize a new project by making use of the Swift Package Manager. In this example, I’m going to use the name Banner for creating the blog post banners.
$ mkdir Banner
$ cd Banner
$ swift package init --type executable
We first created a new folder called Banner, changed directory to this new folder, and then initialized the new package with the type set to executable. The command will print out the following lines:
Creating executable package: Banner
Creating Package.swift
Creating README.md
Creating .gitignore
Creating Sources/
Creating Sources/Banner/main.swift
Creating Tests/
Creating Tests/LinuxMain.swift
Creating Tests/BannerTests/
Creating Tests/BannerTests/BannerTests.swift
Creating Tests/BannerTests/XCTestManifests.swift
As you can see, it automatically took the folder name as the name of the executable. It also created tests, a readme, and a .gitignore file that is adjusted for working a Swift Package.
The created code is very simple and only contains a “Hello, world!” print statement. You can see this by building and running the code:
$ swift build
$ swift run
Hello, world!
This is the very basic setup for our command-line tool!
Adding the ArgumentParser framework
The next step is adding arguments to allow user input. In our case, we would like to add an argument for the blog post title and the week number which is used in the banner’s filename.
We can do this by making use of Apple’s open-sourced ArgumentParser framework. The framework makes it a lot easier to add subcommands and arguments for your command-line tool. It’s a great framework for code inspiration as it makes use of a lot of Property Wrappers.
If you’re unfamiliar with Property Wrappers, you can check out my blog post Property wrappers to remove boilerplate code in Swift.
We can make use of the ArgumentParser framework after adding it as a dependency in our Package file. Open the Package.swift file which will open the Package in Xcode and adjust the file to match the following result:
let package = Package(
    name: "Banner",
    products: [
        .executable(name: "banner", targets: ["Banner"])
    ],
    dependencies: [
        .package(url: "https://github.com/apple/swift-argument-parser", from: "0.0.1")
    ],
    targets: [
        .target(name: "Banner", dependencies: ["ArgumentParser"]),
        .testTarget(name: "BannerTests", dependencies: ["Banner"]),
    ]
)
The package will be imported into Xcode after which you can use it in the main.swift file after building the project:
import SPMUtility

print("Hello, world!")
Note that we’ve also added a product in the Package.swift file. This is needed to be able to use our executable as an actual command-line tool from the terminal.
Creating the main execution command
As we can now make use of the ArgumentParser framework we can start writing the code to generate the banners.
For this, we first need to create our main banner command:
import ArgumentParser

struct Banner: ParsableCommand {
    static let configuration = CommandConfiguration(
        abstract: "A Swift command-line tool to manage blog post banners",
        subcommands: [Generate.self])

    init() { }
}

Banner.main()
We’ve created a new struct called Banner that inherits from the ParsableCommand protocol. This protocol allows us to add a command configuration in which we can configure things like the abstract, subcommands, and the command name. The command name is by default derived by converting the name of the command type to hyphen-separated lowercase words. In our case, this is set to banner, which is perfect!
The Banner.main() does all the hard work and is actually starting the execution of our command. Arguments will be parsed and handled accordingly.
Adding a subcommand by using the ArgumentsParser for reading user input
As you could see in the previous example, we’ve added a subcommand called Generate. Let’s create an instance for this command so we can test our command-line tool for the first time.
struct Generate: ParsableCommand {

    public static let configuration = CommandConfiguration(abstract: "Generate a blog post banner from the given input")

    @Argument(help: "The title of the blog post")
    private var title: String

    @Option(name: .shortAndLong, default: nil, help: "The week of the blog post as used in the file name")
    private var week: Int?

    @Flag(name: .long, help: "Show extra logging for debugging purposes")
    private var verbose: Bool

    func run() throws {
        if verbose {
            let weekDescription = week.map { "and week \($0)" }
            print("Creating a banner for title \"\(title)\" \(weekDescription ?? "")")
        }
    }
}
The Generate struct conforms to the ParsableCommand which allows us again to define a configuration with a describing abstract.
The arguments allow us to get input and make use of three different types of property wrappers:
- Argument: A required argument that is needed for this subcommand.
- Option: An optional argument that can be used as input.
- Flag: Extra options that impact the execution
Each property wrapper takes different types of arguments and allows us to set a help description. We can set a default value for optional arguments and we can make use of a flag to enable specific configurations like verbose logging.
Both the Option and Flag property wrapper allows you to set a name type. This is used when printing out the help description in the terminal.
OPTIONS:
  -w, --week <week>       The week of the blog post as used in the file name
  --verbose               Show extra logging for debugging purposes
As you can see, the week can be set using a short -w or a long --week name while the verbose flag can only be set using a long name --verbose. This can be useful for defining your command-line interface.
The run method is used for executing the command itself. For now, we only add a print statement which will be executed if verbose is set to true.
Making use of our Swift Command-line tool
We can now start using our command-line tool and see what it does.
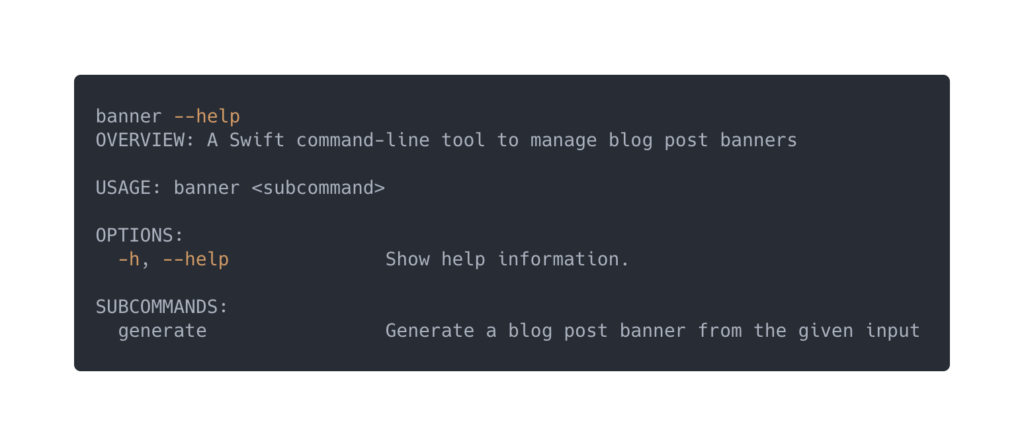
$ swift run banner
OVERVIEW: A Swift command-line tool to manage blog post banners

USAGE: banner <subcommand>

OPTIONS:
  -h, --help          Show help information.

SUBCOMMANDS:
  generate            Generate a blog post banner from the given input
As you can see, the ArgumentParser framework takes away a lot of the work by autogenerating a description as you’re used to from other command-line tools. It also automatically generates a help argument which is common for CLI tools. The description will be printed out by default if you didn’t implement the run method with custom execution logic.
We can do the same for our generate subcommand:
$ swift run banner generate --help
OVERVIEW: Generate a blog post banner from the given input

USAGE: banner generate <title> [--week <week>] [--verbose]

ARGUMENTS:
  <title>             The title of the blog post

OPTIONS:
  -w, --week <week>   The week of the blog post as used in the file name
  --verbose           Show extra logging for debugging purposes
  -h, --help          Show help information.
All our different parameters are printed out nicely and our command-line tool is ready to be used:
$ swift run banner generate "Creating a command line tool using the Swift Package Manager" -w 70 --verbose
Creating a banner for title "Creating a command line tool using the Swift Package Manager" and week 70
Obviously, there’s a lot more to do to actually create our command-line tool for generating the banner. However, this is out of context in terms of this blog post, so I’ll leave it up to you to create the rest of the executable!
Creating a release and installing your command-line tool
After creating your command-line tool you’ll obviously want to install it to try it out for real. We can do this by building with the release configuration. This will create an executable inside the .build/release folder. To actually make use of it, we need to copy it over into the /usr/local/bin folder.
$ swift build --configuration release
$ cp -f .build/release/banner /usr/local/bin/banner
That is enough to make our command-line tool available as a real tool!
Isn’t that awesome?
You can now start using your command-line tool from within any folder from the terminal. You don’t need to build or run it before making use of it. If you would like to make your tool publicly available, you can take a look at my blog post on Swift Packages to read about releasing a Swift Package.
Conclusion
That’s it! We’ve created our own command-line tool by making use of the Swift Package Manager. The ArgumentParser framework makes it really easy to process arguments and after creating a release build, we can use our tool anywhere!
If you like to improve your Swift knowledge, even more, check out the Swift category page. Feel free to contact me or tweet to me on Twitter if you have any additional tips or feedback.
Thanks!