Swift Package Manager (SPM) is Apple’s answer for managing dependencies. We’re all familiar with tools like CocoaPods and Carthage, but we’ll likely all use Swift Package Manager soon instead of those. If you’re deciding which package manager to use, it’s recommended to start using SPM today.
By switching to the Swift Package Manager, we also need to know how to create our own frameworks or libraries with SPM support. So, let’s dive in and see what it takes to create our own package.

What is the Swift Package Manager?
Apple introduced Swift Package Manager in Swift 3.0, enabling us to manage Swift dependencies without a third-party solution. It is similar to tools like CocoaPods and Carthage, which also allow you to add dependencies to your project.
Xcode 11 added integrated support to manage your Swift Packages from within Xcode itself. The Package Manager is integrated with the Swift build system to automate the process of downloading, compiling, and linking dependencies. This automation makes adding and working with external dependencies easy for your Swift projects.
Can we already switch over completely to the Swift Package Manager?
If you have to pick a package manager today, using Swift Package Manager is recommended. It supports all general requirements like version pinning, test targets, custom Swift flags, or packages with resources.
Third-party solutions like Carthage and Cocoapods are open-sourced and will give you more flexibility for edge cases. However, if you’re not doing anything special, it’s better to stick with a first-party solution like SPM.
How to generate a Swift Package using SPM
You can create a Swift Package using either the terminal or Xcode, depending on what you like the most. We’ll cover both options in this article.
Note: If you’re looking for a way to create a command-line tool in Swift, take a look at my blog post Creating a command line tool using the Swift Package Manager.
Creating a Swift Package from the Terminal
To create a Package from the terminal you can use the following commands:
$ mkdir SwiftLeePackage
$ cd SwiftleePackage
$ swift package init
In this example, we’re creating a Package named “SwiftLeePackage”. After running the init command, we will see the steps of creating the library printed out in the terminal:
Creating library package: SwiftLeePackage
Creating Package.swift
Creating .gitignore
Creating Sources/
Creating Sources/SwiftLeePackage/SwiftLeePackage.swift
Creating Tests/
Creating Tests/SwiftLeePackageTests/
Creating Tests/SwiftLeePackageTests/SwiftLeePackageTests.swift
As you can see, it creates all the basic files we need for our own Package, including tests. You can explore your package and run the tests by opening the Package.swift that will open your package in Xcode.
You can also do the same in the Terminal directly be executing the following commands:
$ swift build
$ swift test
Creating a Swift Package in Xcode
The above steps can be replicated in Xcode by navigating to File ➞ New ➞ Package.... Give your package the name it needs, save it, and Xcode will open your Package, enabling you to start working with it directly:
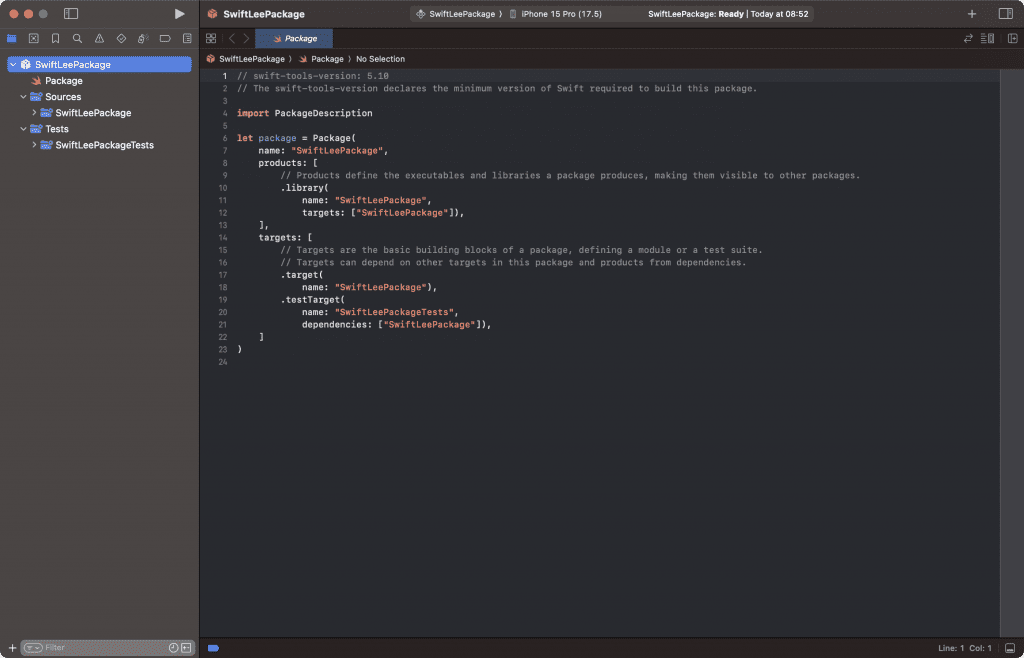
From here, you can start building and testing your package as if you are working on a regular Xcode project.

FREE 5-Day Email Course: The Swift Concurrency Playbook
A FREE 5-day email course revealing the 5 biggest mistakes iOS developers make with with async/await that lead to App Store rejections And migration projects taking months instead of days (even if you've been writing Swift for years)
Enhancing the default generated Package.swift
After creating your package you’ll see the default generated Package.swift file. This includes the name of your package, its products, dependencies, and targets. These are all set to the basics you need for creating a package but you can add a lot more to better describe your package.
How to version Swift packages?
It’s important to know that the first line in the package file is required to stay:
// swift-tools-version: 5.10It indicates which minimum version of Swift is required to build the Package. Packages that omit this special comment will default to tools version 3.1.0, which is probably not what you want.
Suppose you decide to update your package version to the latest Swift version. In that case, you’re also requiring anyone adopting the package to run the latest Xcode version capable of building that version. Therefore, it’s important to consider whether it’s required to update if you’re building an open-source library used by many developers.
Adding supported platforms to a Swift Package file
Swift Package Manager assigns a predefined minimum deployment version for each supported platform by default. If your package will only support specific platforms or specific versions of a platform, you can add that configuration to your package file using the platforms property.
In the following example, we’re adding support for macOS, watchOS, tvOS, and iOS:
// swift-tools-version: 5.10
// The swift-tools-version declares the minimum version of Swift required to build this package.

import PackageDescription

let package = Package(
    name: "SwiftLeePackage",
    platforms: [
        // Add support for all platforms starting from a specific version.
        .macOS(.v13),
        .iOS(.v13),
        .watchOS(.v9),
        .tvOS(.v16)
    ],
    products: [
        // Products define the executables and libraries a package produces, making them visible to other packages.
        .library(name: "SwiftLeePackage", targets: ["SwiftLeePackage"])
    ],
    targets: [
        // Targets are the basic building blocks of a package, defining a module or a test suite.
        // Targets can depend on other targets in this package and products from dependencies.
        .target(name: "SwiftLeePackage"),
        .testTarget(name: "SwiftLeePackageTests", dependencies: ["SwiftLeePackage"]),
    ]
)
If you would like to only add support for iOS 15 and up, you can change the platforms property as follows:
platforms: [
    // Only add support for iOS 15 and up.
    .iOS(.v15)
]
This will indicate to implementers that the package does not support all other platforms.
Adding dependencies to your package
You likely want to add external dependencies to your Swift package. You can do this by using the package’s dependencies property and referencing the dependency in the targets you’d like to have access to.
For example, we could add the Mocker framework as a dependency for our test target:
// swift-tools-version: 5.10
import PackageDescription

let package = Package(
    name: "SwiftLeePackage",
    platforms: [
        .iOS(.v15)
    ],
    products: [
        .library(name: "SwiftLeePackage", targets: ["SwiftLeePackage"])
    ],
    dependencies: [
        // 1. Define the Mocker dependency:
        .package(url: "https://github.com/WeTransfer/Mocker.git", from: "3.0.2")
    ],
    targets: [
        .target(name: "SwiftLeePackage", dependencies: []),

        .testTarget(name: "SwiftLeePackageTests", dependencies: [
            "SwiftLeePackage",

            // 2. Add Mocker as a dependency of the test target
            "Mocker"
        ])
    ]
)
In this example, we’re adding the Mocker framework and telling the package manager to automatically fetch the version starting from 3.0.2. This allows us to fetch versions like 3.0.3 or 3.1.0, but not 4.0.0 as that’s the next major version that’s likely contains breaking changes.
There’s plenty of options here to add specific requirements to your dependency, like using ranges or exact versions:
.package(url: "https://github.com/WeTransfer/Mocker.git", from: "3.0.2"),
        .package(url: "https://github.com/WeTransfer/Mocker.git", exact: "3.0.2"),
        .package(url: "https://github.com/WeTransfer/Mocker.git", branch: "<branch_name>"),
        .package(url: "https://github.com/WeTransfer/Mocker.git", revision: "<commit_hash>")
        .package(url: "https://github.com/WeTransfer/Mocker.git", "3.0.0"..<"3.5.0"),
        .package(url: "https://github.com/WeTransfer/Mocker.git", .upToNextMajor(from: "3.0.2")),
        .package(url: "https://github.com/WeTransfer/Mocker.git", .upToNextMinor(from: "3.0.2"))
Adding a dependency using a specific branch or revision
You can also add specific branches or revisions if you’d like to fetch a dependency that is currently under development or not yet released:
.package(url: "https://github.com/WeTransfer/Mocker.git", branch: "development"),
.package(url: "https://github.com/WeTransfer/Mocker.git", revision: "e74b07278b926c9ec6f9643455ea00d1ce04a021")
Adding a dependency using a local path for development
Another common use-case is to add a local package during development to easily iterate and test it out. You can do this by specifying the path to the package:
.package(path: "/your/local/package/path")Bundling resources with a Swift Package
Each SPM target can contain resources that will become available inside the Swift package code. Resources can contain anything like:
- Core Data files; for example,
xcdatamodeldfiles - Asset catalogs
.lprojfolders you use to provide localized resources
You can add resources by updating your target definition:
.target(
    name: "SwiftLeePackage",
    resources: [
        /// Option 1: Process all resources found in the Resources directory:
        .process("Resources/"),

        /// Option 2: Only add a specific file:
        .process("Resources/image.png"),

        /// Option 3: Copy a file without modifications:
        .copy("Resources/raw_image.png")
    ]
)
As demonstrated in the code example, there are several ways of adding resources. For most use cases, using the process rule will be sufficient. It’s essential to realize Xcode might optimize your files. For example, it might optimize images for a specific platform. If using the original files is necessary, consider using the copy rule.
Excluding specific resources
If needed, you can exclude specific resources using the exclude definition:
.target(
    name: "SwiftLeePackage",
    exclude: ["Readme.md"],
    resources: [
        .process("Resources/")
    ]
)
Accessing resources in code using the module bundle
You can access any resources using the Bundle.module accessor. Note that the module property will only become available if there are any resources rules defined in the package target. For example, we could load an image with the following path: Resources/sample_image.png as follows:
UIImage(named: "sample_image", in: .module, compatibleWith: nil)It’s important to note that the following code won’t work for SwiftUI in packages:
var body: some View {
    Image("sample_image", bundle: .module)
}
Instead, you’ll have to rely on UIKit and load the image as follows:
import SwiftUI
import UIKit

struct ContentView: View {

    var image: UIImage {
        return UIImage(named: "sample_image", in: .module, compatibleWith: nil)!
    }

    var body: some View {
        Image(uiImage: image)
    }
}
This is unfortunate, but the fix is simple enough to work with. For any other resources, you can rely on accessing resources directly using the Bundle:
Bundle.module.url(forResource: "sample_text_resource", withExtension: "txt")Adding a binary target to a package
A binary target is explained as a target referencing a specific binary. Binary frameworks are pre-compiled source code joined by a defined interface that allows it to be used in your apps. A binary framework can be defined as static or dynamic. This is worth an individual article, so if you’re interested, I recommend reading Binary Targets in Swift Package Manager.
Publishing your Swift Package
To publish your Swift package you can simply create a new tag on your Git repository. As you’ve seen in the dependencies section, you can add references to dependencies using Git URLs.
To enable developers to explore packages more easily, Dave Verwer and Sven A. Schmidt have introduced the Swift Package Index. You can start adding your package(s) here.
Conclusion
That was it! We created our own Swift Package in both the terminal and Xcode and added specific platform requirements and dependencies in multiple ways. Bundling resources in your package gives you the flexibility to build anything inside a package.
You can now continue building your command-line tool with the knowledge you gained. Check out my blog post Creating a command-line tool using the Swift Package Manager to learn more.
If you like to improve your Swift knowledge, even more, check out the Swift category page. Feel free to contact me or tweet to me on Twitter if you have any additional tips or feedback.
Thanks!