Launch screens appear when your app starts up and give the user the impression that your app is fast and responsive. After your app is loaded it will be replaced with your app’s first screen after which the user can start using your app.
Xcode creates a storyboard by default which you can use to set up your loading screen. Although this works fine in most cases, there are exciting new options available in Xcode 12 and iOS 14. But before we dive in, let’s see how we all started implementing this back in the days.

The history of launch screens
Launch screens have quite some history. Up until Xcode 6, the only option we had was providing static images inside an asset catalog. This was already better than before as we used to set specific file names for those images to show up.
iOS 8 that came with Xcode 6 allowed us to replace the static image with a storyboard file. This already simplified and improved the way we could define loading screens but the options were still limited. Launch screens are cached heavily and dynamic replacements weren’t really possible. However, using labels, image views, and other interface elements removed the requirement to open an image editing app to export images in all the right dimensions.
Xcode 12 and iOS 14 improved the launch screens for which all the options are described in this blog post.
Guidelines on how to use launch screens
Before we dive into how and when it’s good to know the purpose of a launch screen. It’s hard to do wrong but it’s easy to make it better.
When preparing for implementations like a launch screen it’s always good to revisit the Human Interface Guidelines from Apple. The guidelines give direction and the right start for you to make a great first impression for your users.
Without quoting everything from the guidelines I think it’s most important to understand a few things:
- Using text is discouraged as localization is not available
- Any used images should scale well for different screen sizes
- The screen should be as close as possible to your app’s first page
The last point gives direction. The closer your splash screen gets to your first page, the smoother your app’s first impression will be.

FREE 5-Day Email Course: The Swift Concurrency Playbook
A FREE 5-day email course revealing the 5 biggest mistakes iOS developers make with with async/await that lead to App Store rejections And migration projects taking months instead of days (even if you've been writing Swift for years)
Clearing the cache during development
If I started sharing possible implementations here I bet you would run into situations in which your launch screen doesn’t update. iOS caches your loading views as an image to improve performance. Therefore, I’d like to give you a few tips on how to clear the cache to make sure you’ll see an updated screen before you start spending hours figuring out what is wrong with your set up.
In most cases, during testing on iOS 14, I’ve seen the screen updating correctly. However, in cases it doesn’t you can try any of the following:
- Clean your build folder using
Product ➞ Clean Build Folder - Remove the app from the simulator and reinstall
As a last resort, you could reset the simulator. However, this is time-consuming and doesn’t make you really productive. There’s another undocumented trick provided by Gui Rambo which is not tested on iOS 14+ but might work as well:
public extension UIApplication {

    func clearLaunchScreenCache() {
        do {
            try FileManager.default.removeItem(atPath: NSHomeDirectory()+"/Library/SplashBoard")
        } catch {
            print("Failed to delete launch screen cache: \(error)")
        }
    }

}
You can call this method from your didFinishLaunchingWithOptions method. However, do make sure you only enable this piece of code during development.
Adding a sleep to delay your app’s launch
Yes, you’re reading it correctly. During the development of your launch screen, it can be useful to have a delay added you can take a longer look at your implemented design. If your app launches fast it can be less than a second of time that your launch screen is visible.
I’m using the following code during development so I can take 2 seconds to verify my implementation:
func application(_ application: UIApplication, didFinishLaunchingWithOptions launchOptions: [UIApplication.LaunchOptionsKey: Any]?) -> Bool {
    try! FileManager.default.removeItem(atPath: NSHomeDirectory()+"/Library/SplashBoard")

    do {
        sleep(2)
    }

    return true
}
The options for implementing launch screens
Now you’re up to date with all required information around launch screens it’s time to dive into the available options in Xcode 12 and up. There are two ways of implementing it:
- Using a storyboard (default)
- Using a
plistconfiguration in which you can set:- An image
- Whether the launch image should respect the safe area insets
- A background-color
- Navigation bar visibility
- Tab bar visibility
- Toolbar visibility
- Launch screen configuration per URL scheme
The list of plist configuration options are new in Xcode 12 and allow you set up a launch screen without the use of storyboards. This is great for SwiftUI apps in which it’s kind of ugly to still have a storyboard file for your “splash page”.
Using a storyboard file
This is the default available option since Xcode 6 and is really similar to how you would use the interface builder for building views.
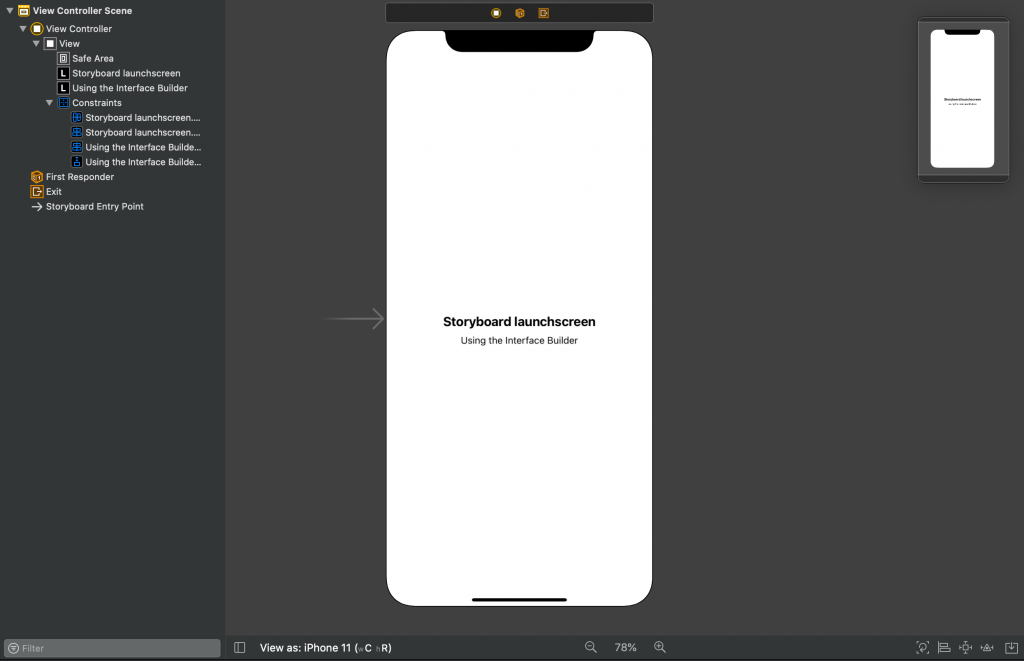
Open the LaunchScreen.storyboard file that is configured in your app’s target “General” tab:

Here you can build up your storyboard as if you would build views using the interface builder:
Using a plist configuration
The other option is to use a plist configuration which is most likely the future of building launch screens as SwiftUI replaces storyboards (playing god here).
This configuration only takes effect if you removed your storyboard key named “Launch screen interface file base name” or
UILaunchStoryboardNamein case of raw keys being displayed.
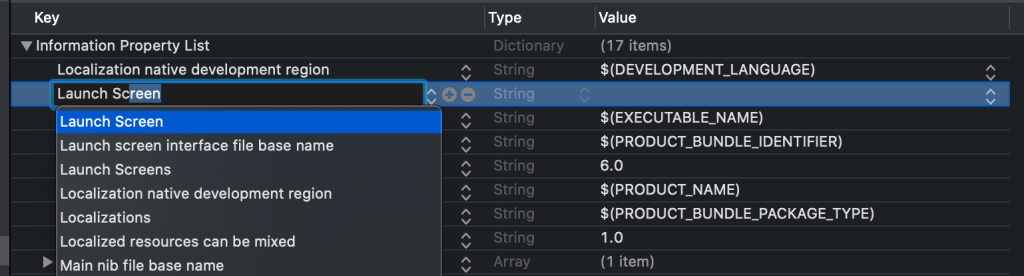
Once you started configuring your launch screen in your Info.plist file you will find it easy to discover the options as they’re listed upon adding a new key. Start by adding a new key called UILaunchScreen named “Launch Screen”:
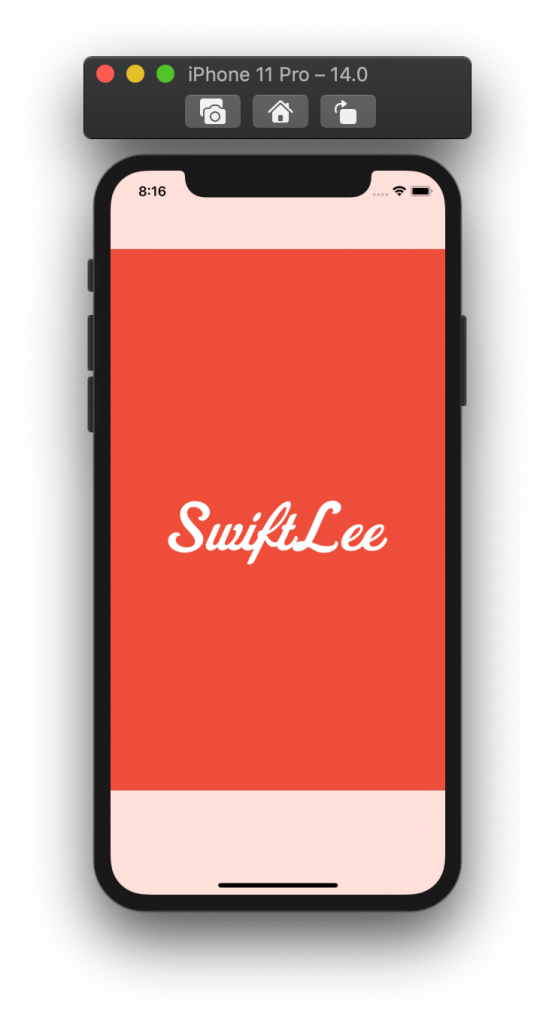
Within this dictionary, you can set a combination of the available options. This means that you can set both a background color and an image:
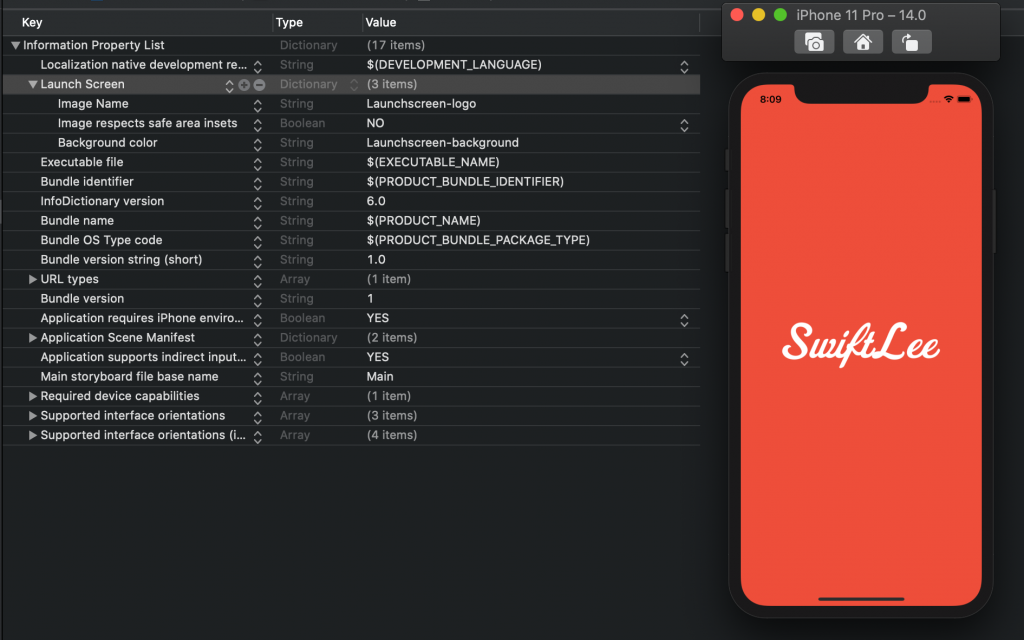
The background image and color are configured in the assets catalog:
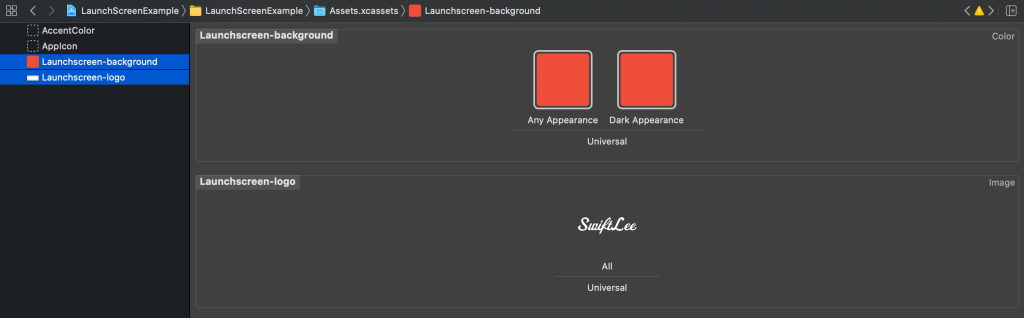
I’m using a single scale SVG image which automatically adjusts for different screen sizes.
Within the same configuration dictionary, we can toggle the visibility of the navigation bar, tab bar, and the toolbar. This could result in the following output:
This would be a great loading screen if my app’s first screen would show both a tab bar and a navigation bar. The transition would be smooth and natural!
Unfortunately, as you can see in the above image, the tab bar is a bit too high. As of today, it seems that the feature is still a work in progress.
Configuring launch screens per URL scheme
Another new option that comes with Xcode 12 is the possibility to configure a different loading screen per URL scheme. If your app is using custom URLs to deep-link into your app you might find it useful to adjust the loading screen per scheme so your app transitions smoothly.
You can test your deeplinks and universal links with RocketSim to iterate quickly and improve productivity.
You can configure the following options:
- A default launch screen
- Launch screens to use per URL scheme
An example could be to only show the tab and navigation bar for the launchscreen:// URL scheme:
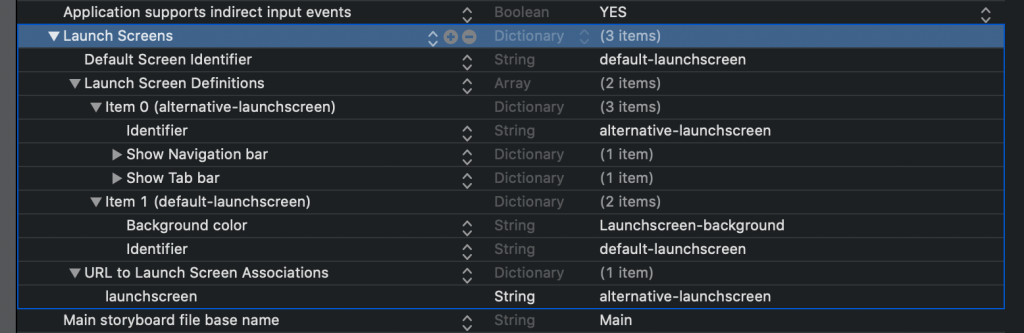
The key for this is called UILaunchScreens named “Launch Screens” and requires to provide a default configuration, launch screen definitions, and URL associations.
The URL associations are defined in a dictionary with the keys set to the URL schemes. A URL scheme like launchscreen:// is defined as launchscreen. The value should match an identifier of your launch screen definitions.
Conclusion
Launch screens have a history of improvements and Xcode 12 adds a new chapter to this story. Defining different launch screens per URL scheme, toggling the visibility of toolbars, and defining a configuration inside your info.plist remove the need for a launch screen storyboard.
If you like to improve your Xcode knowledge, even more, check out the Xcode category page. Feel free to contact me or tweet to me on Twitter if you have any additional tips or feedback.
Thanks!