App Preview Videos are important for both App Store presence and app marketing. Yet it can be challenging to create realistic videos, especially if your app runs only on a physical device. You also often have a more realistic version of your app running on your iPhone, as you’re using it yourself with real data.
QuickTime lets you record a USB-connected device, but the resulting videos are square and lack device bezels: not something you’re proudly sharing for App Marketing. There are techniques for manually adding a device bezel, but that’s time-consuming and not ideal. In this article, I’ll share a way to create beautiful App Preview Videos with a few clicks.

Recording a USB-connected iPhone for App Preview Videos
After connecting your physical device to your MacBook using a USB cable, you’ll be able to use apps like QuickTime to create a recording. Since the release of RocketSim 16.0, you can also directly record your screen with device bezels, audio, and a beautiful background. It works for both App Store Videos and Screenshots, and the best part: the resulting recording is accepted directly by App Store Connect. No need to finetune compression or resolutions.
You can install RocketSim for free via the Mac App Store. Once you’ve opened RocketSim, it will detect developer-enabled devices automatically on your local network. A new window shows up:

As suggested in the UI, you need to connect your device via a USB cable. RocketSim will start streaming your screen live, allowing you to use it during debugging as well. The well-known side window will show up for the device with several options:
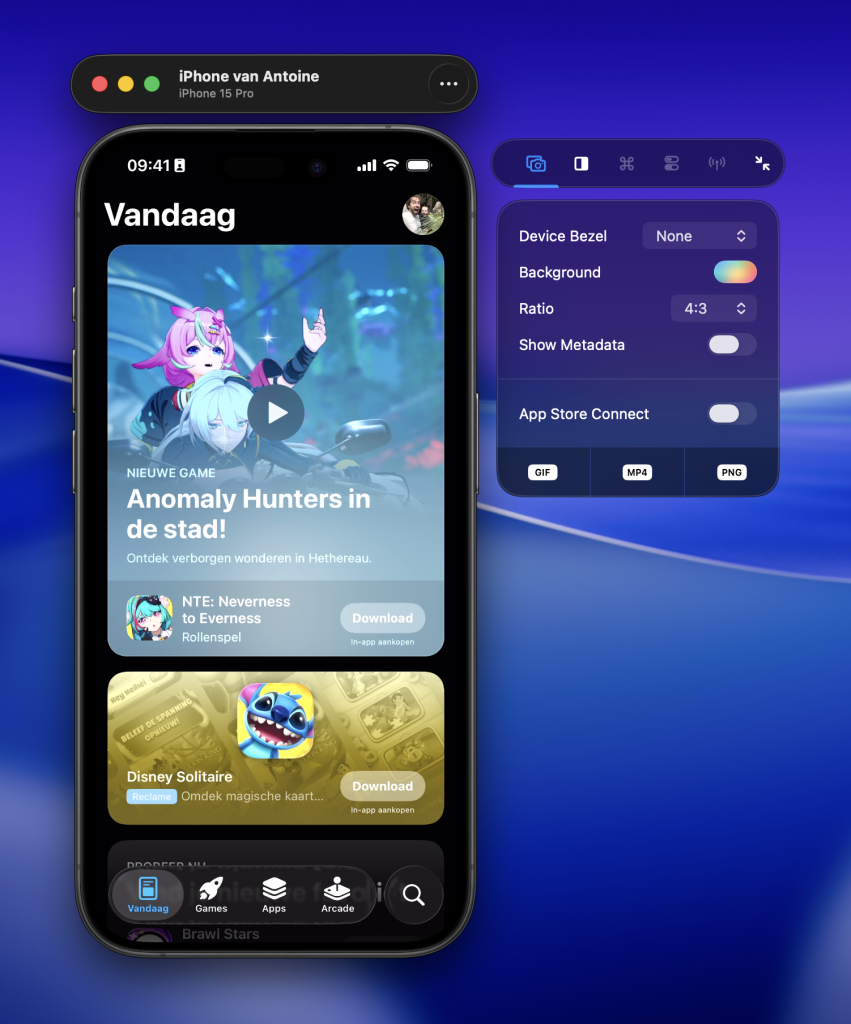
The above example shows the iOS App Store, only available on physical devices. We can select a device bezel, aspect ratio, and background from the side window. There’s also an option to show App Metadata, which lets you display your app’s icon, title, and a custom subtitle in the recording. When you enable the App Store Connect toggle, you’ll get App Store Connect-supported exports.
Post-editor for screenshots and videos
Anything you capture can be post-edited to fine-tune the recording. You can change the background, adjust the bezel, or use a different ratio:
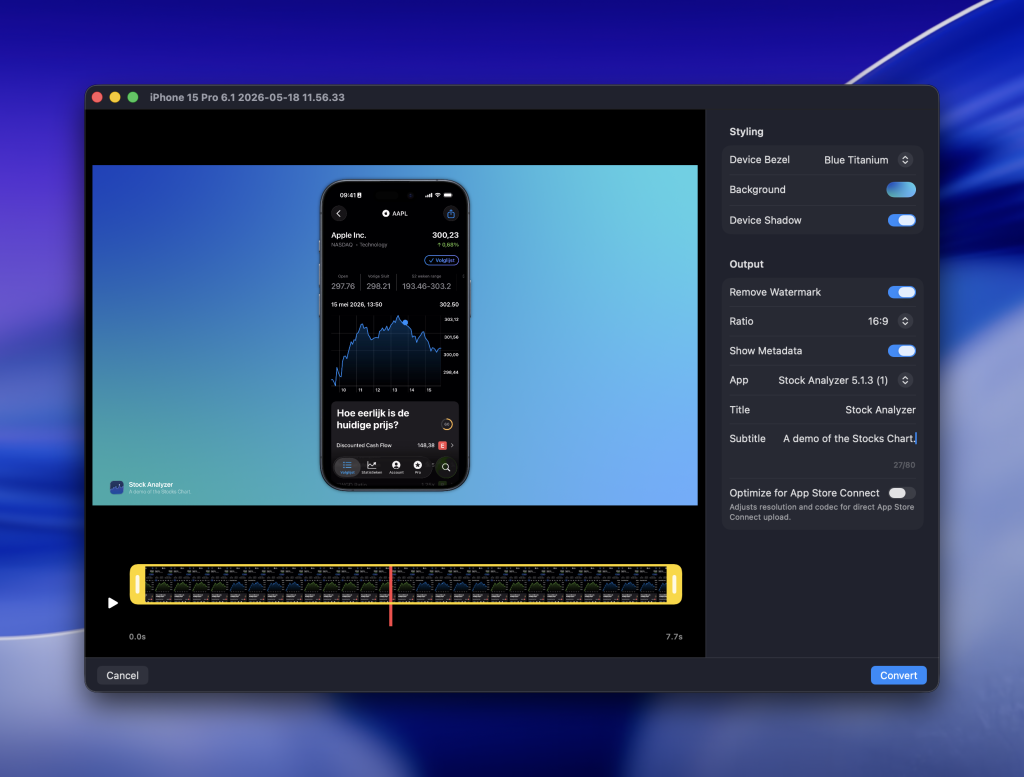
The editor above also shows the metadata in the bottom-left corner. In this case, I decided to use a subtitle “A demo of the Stocks Chart.” as it matches the video I created.

FREE 5-Day Email Course: The Swift Concurrency Playbook
A FREE 5-day email course revealing the 5 biggest mistakes iOS developers make with with async/await that lead to App Store rejections And migration projects taking months instead of days (even if you've been writing Swift for years)
Get started today
RocketSim is available on the Mac App Store, and many of its features are free. You can read more about all features in the documentation, specifically the Physical Device Support page.
Bonus: Design Comparison
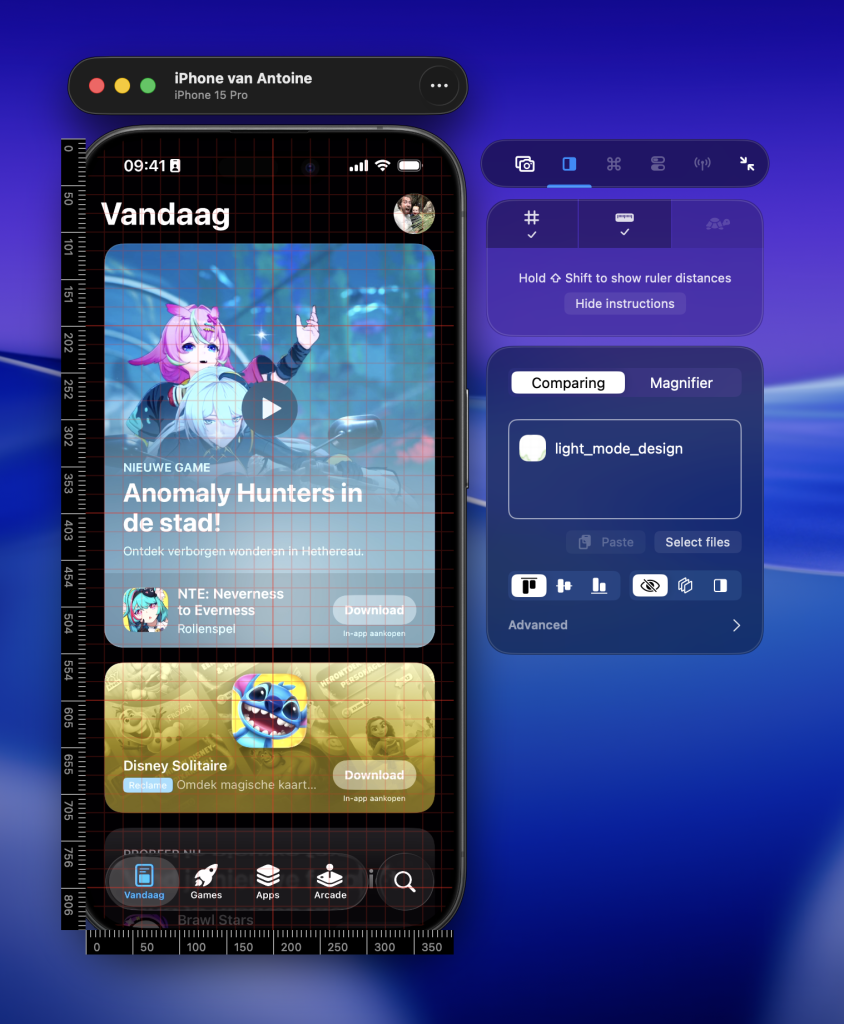
While you’re here to learn about creating recordings and screenshots from a physical device, there’s more to benefit from! RocketSim’s unique design comparison feature also works with physical devices. That means you’re able to show a grid, rulers, and your custom designs to compare how well your design is implemented.
You can learn more about this in RocketSim’s Design Comparison documentation.
Conclusion
App Preview Videos are great for App Store presence and app marketing. Using RocketSim’s 16.0 update, you’re able to quickly create beautiful recordings after connecting your physical device via USB.
If you’re new to RocketSim, it’s used by over 80,000 developers and 250+ teams and offers more than 30 features to help you develop apps faster. Learn all about it at rocketsim.app.
Enjoy!