Localization testing becomes vital if your apps are localized in multiple languages. You want to ensure your UI looks good in each language, making you repeatedly run your app in each locale. Some words are different in length depending on the language, making it crucial to verify your interfaces.
Xcode provides several options for testing localization, each with pros and cons. Ideally, you would automate testing via UI or snapshot tests, but you want to verify manually during active development. Let’s dive into the different options.

Using custom scheme settings
Your first options is to change the scheme settings of your app target to a language you want to test in:
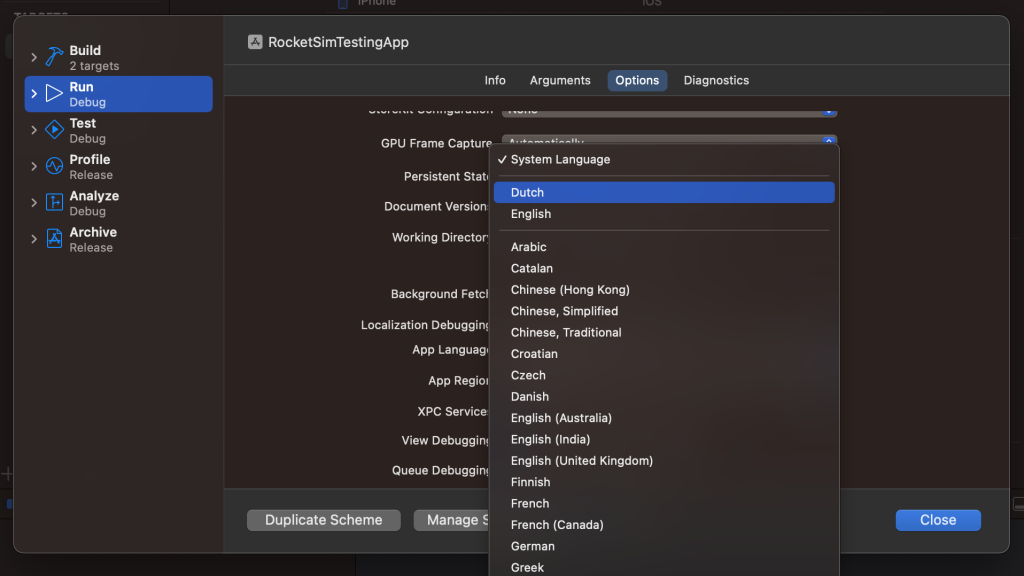
The list of languages will show a separate section containing the supported languages for your app. In my example, these are Dutch and English. Once selected, your app will launch using the preferred language. While it works great, it might be annoying to go into the scheme settings for every supported language constantly.

FREE 5-Day Email Course: The Swift Concurrency Playbook
A FREE 5-day email course revealing the 5 biggest mistakes iOS developers make with with async/await that lead to App Store rejections And migration projects taking months instead of days (even if you've been writing Swift for years)
Changing the Simulator system language
Another common option used by developers is to change the Simulator system language:
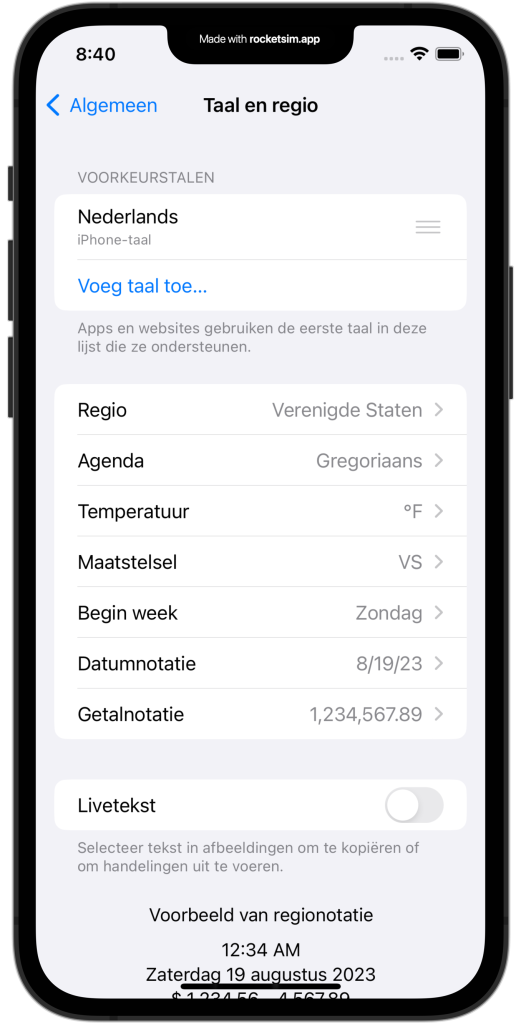
In the above example, I’ve updated the system language to Dutch. A benefit of changing the system settings is that all apps and widgets will be localized without changing Xcode project settings. The downside, however, is that the Simulator will have to restart for each language change. Secondly, you’ll have to change the language for each Simulator device used individually.
Previewing localizations in SwiftUI
If you’re creating your views using SwiftUI, the most optimal solution would be to create previews for every language used. You can use the environment override view modifier as follows:
struct ContentView_Previews: PreviewProvider {
    static var previews: some View {
        ContentView()
            /// Use the language identifier for the locale to verify.
            .environment(\.locale, .init(identifier: "nl"))
    }
}
You don’t want to write a preview configuration for each language manually. Therefore, you can iterate over your app’s supported languages and create a preview as follows:
struct ContentView_Previews: PreviewProvider {
    static var previews: some View {
        ForEach(Bundle.main.localizations, id: \.self) { localization in
            ContentView()
                .environment(\.locale, .init(identifier: localization))
                .previewDisplayName("Locale: \(localization)")
        }
    }
}
SwiftUI previews are great and allow you to iterate fast. However, it’s important to always test your views in the Simulator or on a device to validate them with actual data.
Localization testing using RocketSim
RocketSim allows you to validate localization by using its perform menu. It will list the supported languages and relaunches your app using the selected locale:
Relaunching using RocketSim is an excellent option for quick iteration, but it has the downside of not changing the language of any extensions like widgets. However, it’s the fastest way of testing multiple locales with actual data in the Simulator.
Conclusion
You can test localization in Xcode using several techniques, each with pros and cons. Depending on whether you want to test with actual data or not, you’ll have to pick an option that works best. SwiftUI previews are great during the initial implementation of your views, while RocketSim’s fast iteration allows you to verify different locales with actual data in the Simulator.
If you like to improve your Xcode knowledge, even more, check out the Xcode category page. Feel free to contact me or tweet me on Twitter if you have any additional tips or feedback.
Thanks!