Universal Links allow you to link to content inside your app when a user opens a particular URL. Webpages will open in the app browser by default, but you can configure specific paths to open in your app if the user has it installed. This behavior is well known as “deeplinking” into your app.
Redirecting users to your app is recommended to give them the most integrated mobile experience. A great example is the WeTransfer app, which automatically opens transfer URLs and allows the app to download files using the most efficient system APIs. The alternative would require users to download the files via Safari, a much less integrated experience. Let’s dive in to see how you can add support for Universal Links.

The difference between deeplinks and Universal Links
Before we dive into Universal Links, it’s essential to understand the difference between deeplinks. Earlier, I explained how to set up and handle deeplinks in SwiftUI. The difference is best described by looking at the URL format:
- Deeplink:
recipeapp://open-recipe?name=recipename - Universal Links:
www.recipes.com/recipename
A deeplink uses a custom scheme with a path defining the action to execute. Universal Links are web URLs that open a web page if the app is not installed. In other words, deeplinks only work if the app exists, while universal links fall back to the web variant.
For the users, it’s a better experience to use Universal Links to ensure they’ll find what they’re looking for. If you cannot provide a web variant of the content you’re linking to, you can consider building an App Clip and reusing the code of your main app.
If you’ve got RocketSim installed, you can test a deep link on your Mac. Click the following URL: rocketsim://open-roadmap. RocketSim should open its roadmap, allowing you to vote on upcoming features. In other words: deeplinks and universal links are supported on macOS as well!
Supporting Universal Links
When users tap a universal link, the system redirects the link directly to your app without routing through Safari or your website. To make this work, you must establish a two-way connection between your app and the domain. We do this by adding a so-called associated domain file to your website.
Adding an associated domain file to your website
An associated domain file contains information about your app and the domains your app supports. The system checks when users install your app to ensure URLs open correctly. You secure the association of your app and website since you’re the only one able to store this file on your server.
You can find an example of such a file for my Stock Analyzer app: https://stock-analyzer.app/.well-known/apple-app-site-association. The file looks as follows:
{
    "applinks": {
        "details": [{
            "appIDs": ["4QMDKC8VLJ.com.swiftlee.StockAnalyzer"],
            "components": [{
                "/": "/stock/*",
                "comment": "Matches any URL whose path starts with /stock/"
            }]
        }]
    },
    "appclips": {
        "apps": [
            "4QMDKC8VLJ.com.swiftlee.StockAnalyzer.Clip"
        ]
    }
}
In this case, you can see that any URL containing the /stock/* path will open inside Stock Analyzer if the user has the app installed. The components array can be configured in several ways, for which Apple provides a few examples:
{
  "applinks": {
      "details": [
           {
             "appIDs": [ "ABCDE12345.com.example.app", "ABCDE12345.com.example.app2" ],
             "components": [
               {
                  "#": "no_universal_links",
                  "exclude": true,
                  "comment": "Matches any URL with a fragment that equals no_universal_links and instructs the system not to open it as a universal link."
               },
               {
                  "/": "/buy/*",
                  "comment": "Matches any URL with a path that starts with /buy/."
               },
               {
                  "/": "/help/website/*",
                  "exclude": true,
                  "comment": "Matches any URL with a path that starts with /help/website/ and instructs the system not to open it as a universal link."
               },
               {
                  "/": "/help/*",
                  "?": { "articleNumber": "????" },
                  "comment": "Matches any URL with a path that starts with /help/ and that has a query item with name 'articleNumber' and a value of exactly four characters."
               }
             ]
           }
       ]
   }
}
You can configure multiple application IDs that are formatted as follows:
<Application Identifier Prefix>.<Bundle Identifier>The file must be named apple-app-site-association (without extension) and uploaded inside a folder called .well-known. Lastly, you must ensure the file uses https:// with a valid certificate and no redirects.
Associating your app with your domain
You can associate your app with your domain by adding the Associated Domains Entitlement by tapping the + Capability button in Xcode:
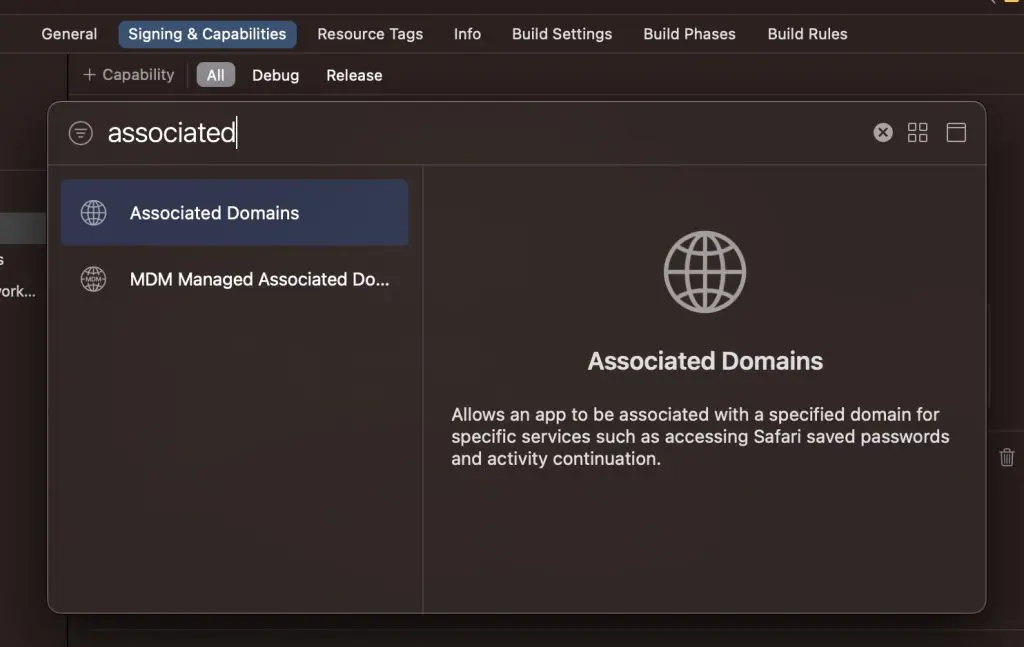
Once added, you can start configure entries for each domain you want to support:
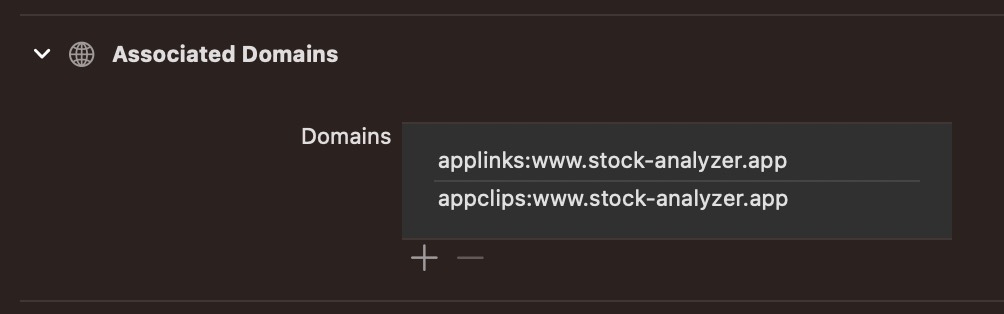
My Stock Analyzer app supports only a single domain for Universal Links (applinks:) and App Clips (appclips:). You must ensure having an entry for each domain-associated file entry.
Handling subdomains
Your site could support multiple subdomains, like example.com and www.example.com. In this case, it is essential to add an entry for each domain inside the associated domain file and app entitlement.

FREE 5-Day Email Course: The Swift Concurrency Playbook
A FREE 5-day email course revealing the 5 biggest mistakes iOS developers make with with async/await that lead to App Store rejections And migration projects taking months instead of days (even if you've been writing Swift for years)
Handling Universal Links inside your app
You can handle Universal Links inside your app by adding the openURL modifier inside SwiftUI views or implementing a specific AppDelegate method. You can follow the configuration section of my deeplinks article for more details.
Testing Universal Links
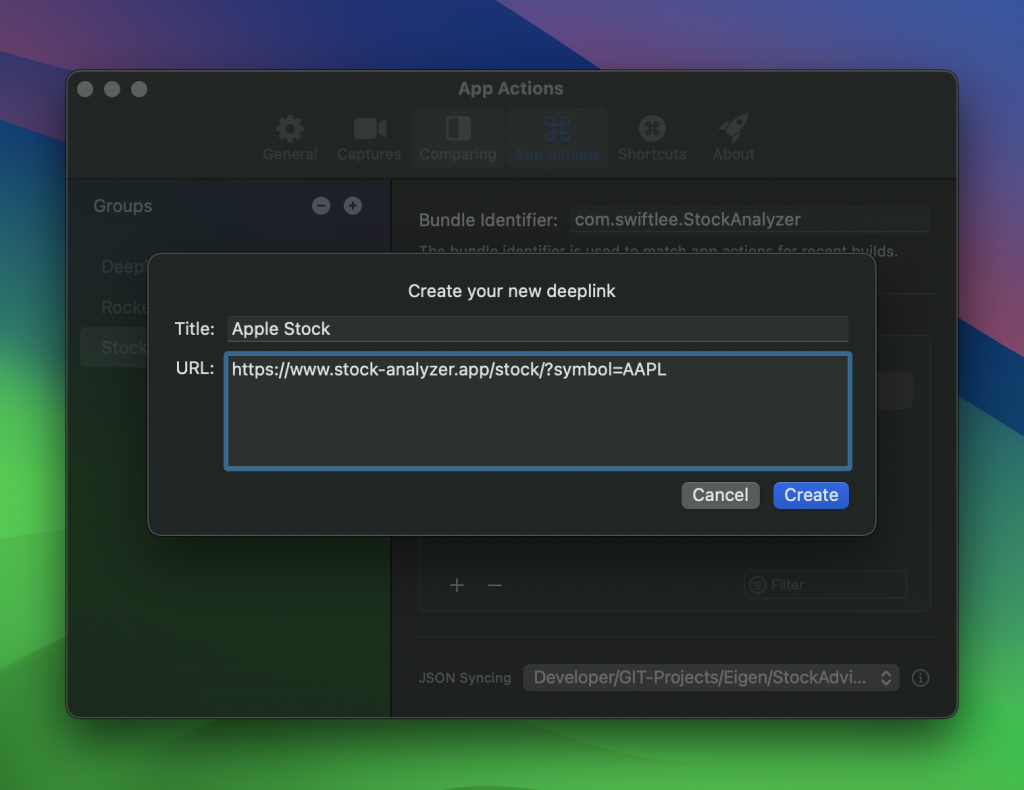
After configuring both the domain and app-associated domains, testing your implementation is essential. I recommend using RocketSim to test both deeplinks and Universal Links, as you can access them right next to the simulator.
After installing RocketSim, you can open its Settings window and add a new Deeplinks Group:

Configuring your bundle identifier to match your app is essential, so quick actions appear inside RocketSim’s Recent Builds section (I’ll show that later). Secondly, you need to add a new Universal Link using the “Add” button in the bottom-right corner:
Once you’ve created a group with Universal Links and matching bundle identifier, you can start accessing URLs directly next to the Simulator:
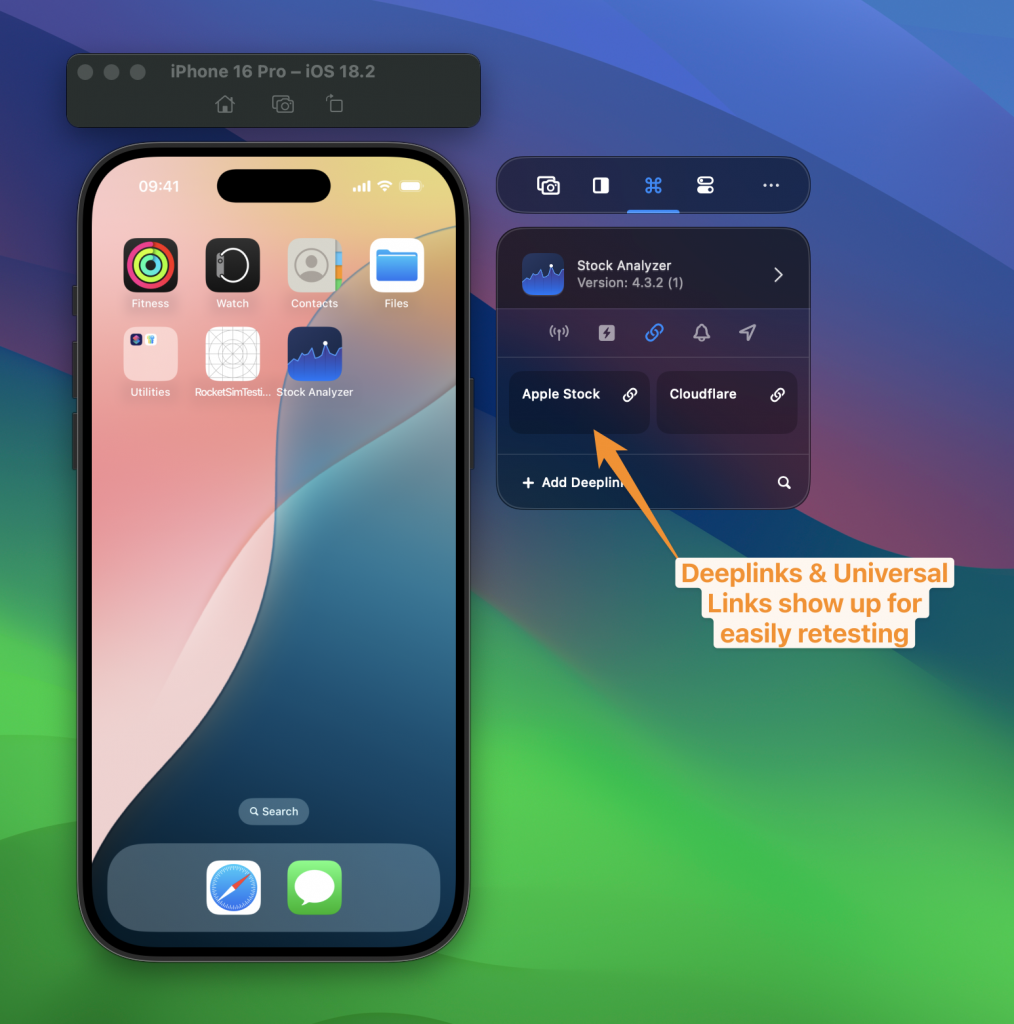
You’ll now only have to tap the quick action button to open the URL inside your app. RocketSim is excellent for these cases and allows you to do the same for testing locations, push notifications, or optimizing for network reachability.
Conclusion
You can use Universal Links to create an integrated user experience by opening web URLs directly in your app. Unlike deeplinks, users will be redirected to a web page if the app isn’t installed. An entitlement inside your app, combined with a domain-associated file, secures a relationship between your site and app.
If you want to improve your SwiftUI knowledge, even more, check out the SwiftUI category page. Feel free to contact me or tweet me on Twitter if you have any additional tips or feedback.
Thanks!